A Helpful Guide: How to Install Kitchen Cabinets
So, you’ve decided to install your kitchen cabinets yourself. Of course, DIYing any home renovation comes with risks, but it’s important to know how to install kitchen cabinets properly prior to putting them together yourself, especially if you’ve ordered a set of RTA cabinets. Because we know how stressful it can be to DIY something, we put together this helpful guide that should ideally make your kitchen cabinet installation a breeze.
Choosing the Right Cabinets for Your Space
Kitchen cabinets aren’t a one-size-fits-all venture. Only you know what you want in your space and what your actual budget is. Of course, we offer a free kitchen design to help you choose the best cabinets for your space, but the ultimate choice is yours. You, as the homeowner, are the only one who can determine which cabinets will ultimately go in your kitchen.
There are lots of factors that determine which cabinets are right for you. They include:

Timeline
Are you looking to have your cabinets installed within a month? Two? The timing of your cabinet installation will determine which cabinets you go with. Our Express cabinets are great for quick turnaround times, but quick turnarounds typically come with less options for customization.
Customization
Speaking of customization, the features you want in your cabinets will also determine which ones are right for your space. Do you want increased depths? Maybe you’re looking for cabinet doors that have glass panes. Either way, the different customizations and features you want in your cabinets will help you narrow down your search.
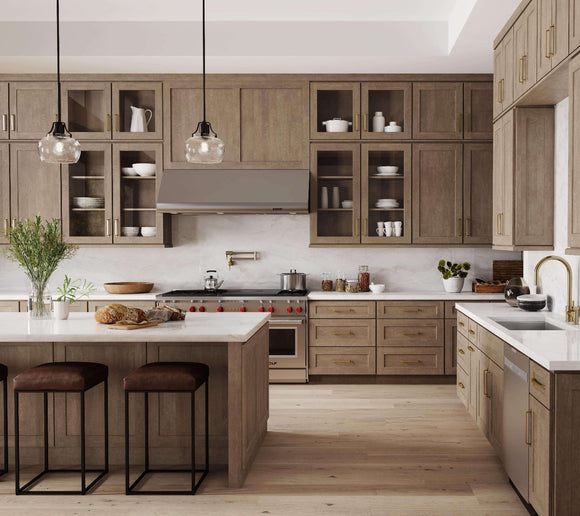
Finishes
Finishes are an important part of a kitchen design. Different from colors, cabinet finishes are similar to paints — matte and glossy are the two most common. Glossy finishes give off a shine, whereas matte finishes make things look very smooth with little glare on the surface. Depending on which finish you prefer, that will help you choose the right cabinets.
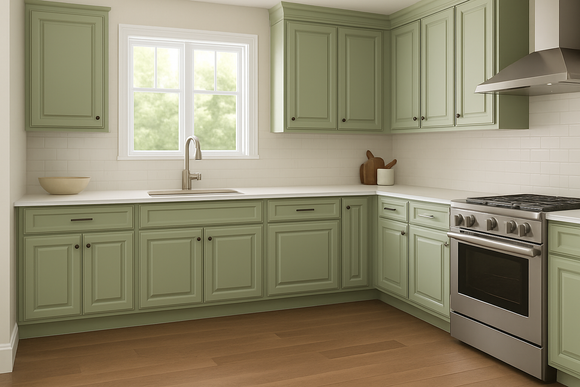
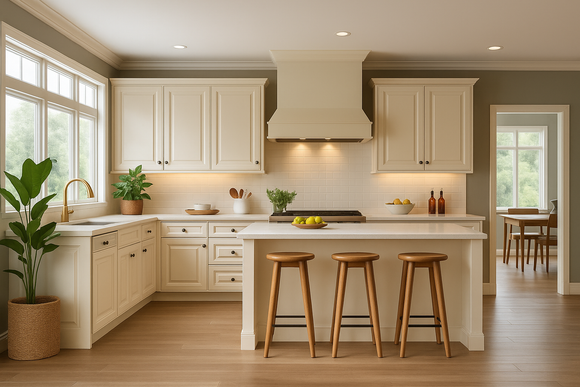
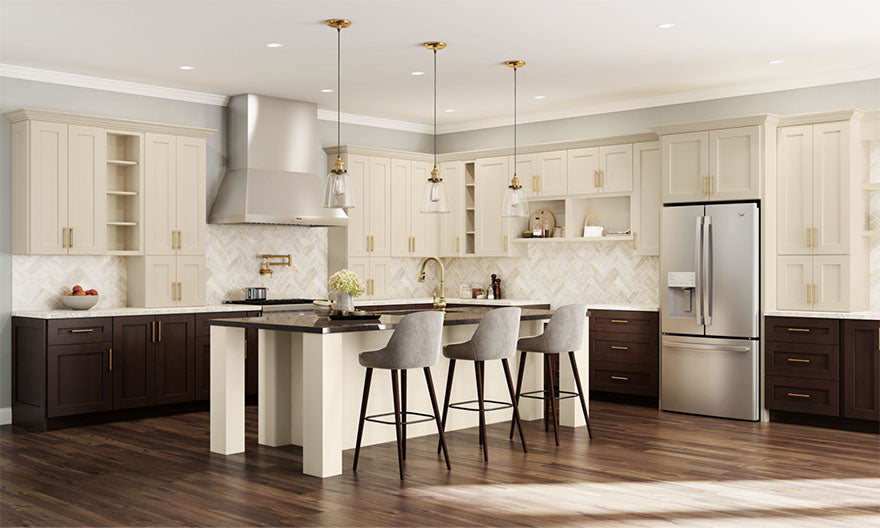
Colors
Probably one of the biggest determining factors in kitchen cabinets is the color. The color of your cabinets has a huge impact on the actual cabinets you choose. Looking for white cabinets? Maybe you’re more of a gray cabinet person. Or, maybe you’re bold and looking for cabinets as bright as your personality. Or, maybe you’re traditional and want a simple medium brown cabinet to go in your space. No matter which colors are your preference, we have the cabinets that are perfect for your space.
RTA Cabinets vs. Fully Assembled Cabinets
When browsing for cabinets, you’ve probably come across two different types of cabinets. Ready-to-Assemble (RTA) cabinets and Fully Assembled cabinets. Both cabinet types have their pros and cons. Here’s a helpful chart to get you started!
|
Cost |
Turnaround Time |
Features |
Installation Needed? |
|
|
RTA Cabinets |
$ |
<1 month |
Limited |
Yes, and assembly |
|
Fully Assembled |
$$ |
1 - 2 months or more |
Customizable |
Yes |
Cost
RTA cabinets typically cost much less than fully assembled cabinets. Fully assembled cabinets arrive with the cabinet bases, doors, drawers and shelves assembled, but it doesn’t include installation into your space. Coupled with the increased cost for pre-assembly at the manufacturer, fully assembled cabinets are typically much more expensive than RTA cabinets. But, for homeowners who aren’t construction pros or don’t have the time to assemble the cabinets themselves, fully assembled cabinets can be a great option.
Turnaround Time
Fully assembled cabinets typically take longer to ship than RTA cabinets. Our NorthPoint Cabinetry can be ready in three to four days, and you’d typically receive your shipment within two weeks! This is because RTA cabinets typically come in standard colors, sizes and features. There usually isn’t much customization to them. For many homeowners, this is much better than waiting a month or so for their assembled cabinets to come in. They’re willing to sacrifice certain features if it means getting their renovation project done much quicker. Our Woodline cabinets are a great choice for homeowners looking for customized, fully assembled cabinets that have a short turnaround time.
Find the Right Cabinets for Your Space with NorthPoint Cabinetry!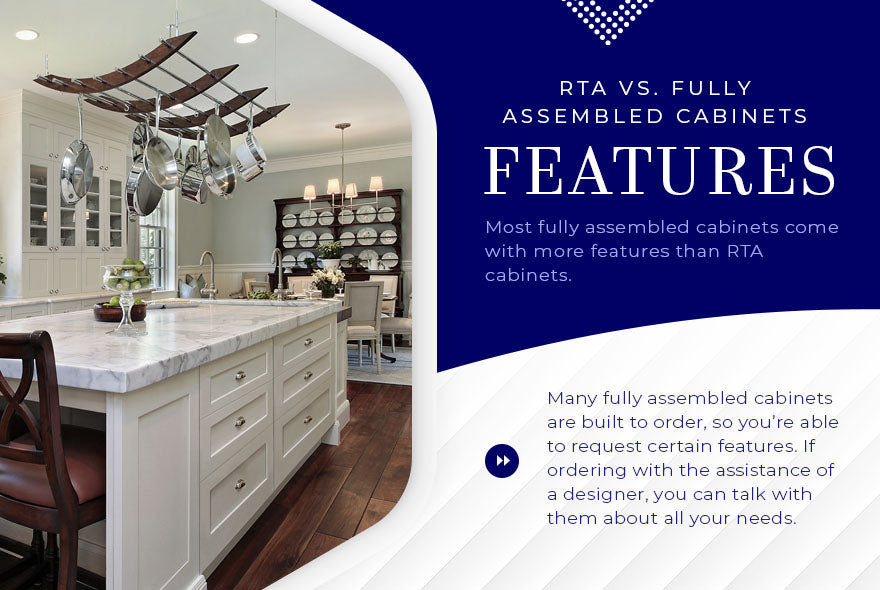
Features
Most fully assembled cabinets come with more features than RTA cabinets. This is because many fully assembled cabinets are built to order, so you’re able to request certain customizations and features when placing your order. If ordering your cabinets with the assistance of a designer, then you can talk with them about all your design needs. That way, you can be sure to get the cabinets that are perfect for your space.
Installation Time
Installing RTA cabinets takes more time than fully assembled cabinets. This, of course, is because you not only have to install RTA cabinets, but you have to assemble them prior to installation. It takes time to put together bases, shelves, doors and drawers, which is why ordering fully assembled cabinets is so appealing to many homeowners. However, if you hire a professional to assemble and install your RTA cabinets for you, then you’ll be able to save yourself the hassle of installing your cabinets yourself or spending the time to do it.
Depending on your budget, timeline, desired features and ability to install cabinets, you will need to choose between RTA cabinets or fully assembled ones. Some of those factors outweigh others, too — maybe you’re willing to extend your project timeline if it means you get the custom cabinet shelving you’re looking for. Or, maybe cost is more important to you than anything else. Either way, making those decisions early on will make your cabinet choosing process much more efficient and easier.
Installing Cabinets
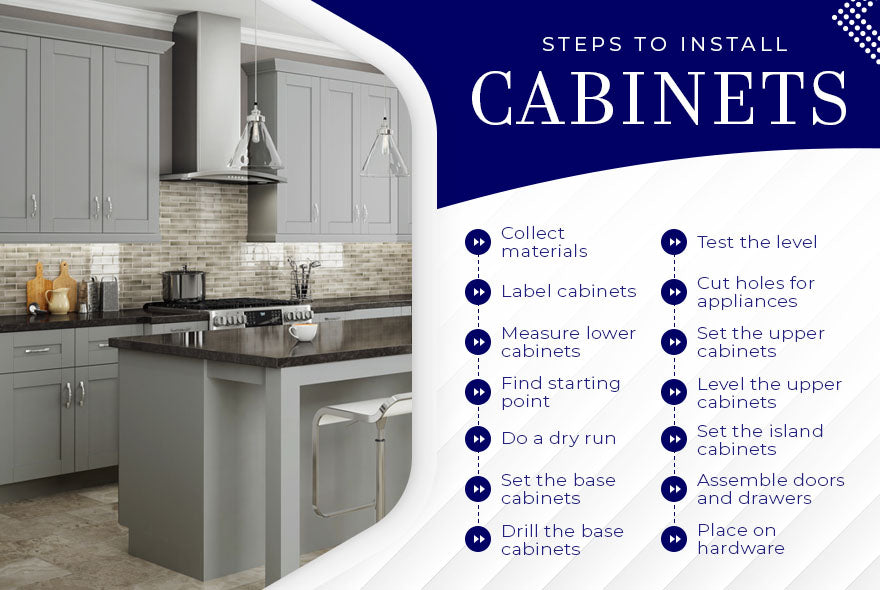
So, you’ve ordered your cabinets, and they’ve been delivered. Now what do you do? Install them! Here are the steps to installing your cabinets.
1. Collect your materials. It’s important to collect all your materials now so that you don’t get halfway through your project and are missing a tool. Get your screws, drill bits, pencils, levels and any other tools you think you’ll need prior to starting your cabinet installation. Make sure you place them somewhere that is easy for you to access during your installation. There’s nothing worse than looking for a screwdriver and realizing it’s all the way on the other side of the room.
Shop RTA Cabinets Now!2. Label your cabinets. Make sure you take the time to mark all the doors, drawers, bases and other pieces so that you know what matches when you go to assemble them later on. This is important because putting them together incorrectly can cost you time and money. And, since you’re probably installing the cabinets yourself to save on both of those things, it’s important you do the process correctly.
3. Measure out your lower cabinet spacing. Using a level, tape and a pencil, mark out where your lower cabinets will go. You’ll want to find the highest spot on your floor (where the baseboard stops) and measure up from there, depending on the height of your cabinets. Don’t forget that you’ll be adding height with your countertop.
4. Figure out where your starting point is. Typically, you’ll want to start with a corner cabinet, especially if you have an L-shaped kitchen. For galley kitchens, or kitchens that have a peninsula but aren’t going to be in a U-shape (kitchens without corner cabinets), you might start at a different point. If you have a Lazy Susan corner cabinet, it’s imperative that you align all the cabinets perfectly because of the way those cabinets are framed.
5. Do a dry run. Without anchoring any of the cabinets to the walls, place them in the spaces you’d like them to go, making sure to account for any filler strips or other accommodations you’d need to make. If the cabinets all align with your marks on the walls perfectly, then you’re good to go! If not, then you need to go back to the drawing board — usually this means making the filler strips longer or shorter. If you ordered cabinets unassembled, you might want to consider assembling them now so that you can check to be sure all the drawers and doors work and that everything clears the way it’s supposed to. If you’re confident that everything should be fine, don’t worry about assembling them just yet. It’s much easier to anchor the cabinets into the wall when you don’t have drawers and doors opening while you tilt the cabinet bases.
6. Set the base cabinets. Take the first base cabinet and place it ¼ of an inch away from your positioning line. Using a wooden shim, make the cabinet level with the lines you made on the wall. After using shims to make the cabinet level, attach the second cabinet with a clamp, leveling it and then screwing the two base cabinets together. Continue this for all your base cabinets.
- Recommended: Before screwing the cabinets together, make sure you pre drill a pilot hole with a bit that is slightly smaller than the screw you are using to put the cabinets together. We recommend using a #6 2 ½” wood screw and a ¼” drill bit for the pilot hole.
7. Drill the base cabinets to the wall. After setting all your base cabinets, now is the time to attach them to the wall. Using your drill, screw the base cabinets into the marked spaces on your wall through the back. If you set your cabinets correctly, this shouldn’t take very long, and your cabinets should attach to the wall relatively easily.
- Recommendation: The cabinets need to be screwed into a stud. Studs can be located using a stud finder. We also recommend using a #6 3” long wood screw for attaching to the wall.
8. Test the level of your cabinets. Before moving on to anything else, test the level of your cabinets by placing a level on the back of your base cabinets. If the level comes out even, then congrats! You’ve set your base cabinets properly.
9. Cut out holes for your appliances. Whether you need to cut out holes for sinks, electrical wire or plumbing, now’s the time to do that. You want to get it done before you take away head space by putting in upper cabinets and before you try to lay countertops down. If you aren’t installing an island or peninsula, then you’ll want to do this prior to setting your base cabinets since all the cutouts will be at the back of your cabinets.
10. Set the upper cabinets. Setting the upper cabinets should happen before you do your island or peninsula cabinets because you’ll want to have a clear space in the middle of your kitchen to work on your island or peninsula. Using the same techniques and recommendations as for your base cabinets, mark out all the lines and heights of your upper cabinets. You’ll want to make sure that you add a ledger to your marking area so that you can easily rest your cabinets up against the wall while you screw the cabinets in. Upper cabinets are notoriously difficult to install when you’re working by yourself, and having the ledger is worth any additional patching and painting you’ll need to do after removing it from the wall after you’re done. You can also cover the holes up with backsplash.
11. Level the upper cabinets. After setting the upper cabinets, you’ll want to use the level again to make sure that you set them correctly. If the level comes out even, then you’ve completed setting all your wall cabinets.
12. Set the peninsula or island cabinets. These are slightly different because they don’t have a wall behind them to support them. For peninsula and island cabinets, you’ll want to attach a back to your cabinets — either with painted plywood or another material, such as shiplap. This will give the back of your island or peninsula a unique design feature. The main thing to note about setting the peninsula or island cabinets is that you’ll need to anchor them to the floor by blocking them. Using 2-by blocking, screw the cabinets into the subfloor to secure them.
13. Assemble doors and drawers. After setting all your cabinets and ensuring they’re level, now you can assemble the drawers and doors. Prior to putting the doors onto the cabinets, be sure to set all the shelves at the heights you want. This will save you time in the long run, so start thinking about your kitchen organization at this point. Having a plan prior to finishing your cabinet installation will make setting up your kitchen later a breeze.
14. Place on hardware. After assembling all your drawers, doors and shelves, now you can place the hardware onto your cabinets. Depending on the type of cabinet handles you choose, you’ll need to measure out the spacing for the handles. Oblong handles need this especially, since there are two points for the handles to attach to the cabinets.
Image Credits
Nack Thanakorn/Shutterstock.com
Gegham Kalajyan/Shutterstock.com