How to Remove Kitchen Cabinets
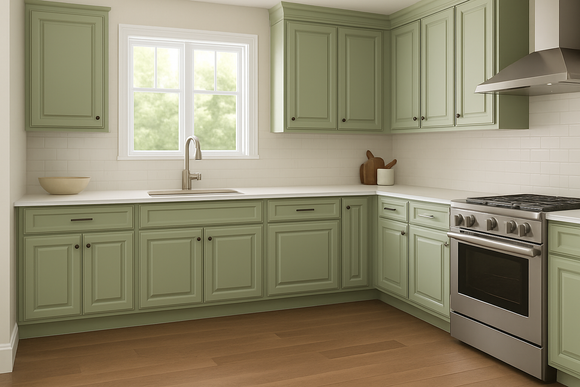
Source: ungvar/Shutterstock.com
Renovating your kitchen? Even if you are keeping your cabinets, you should probably remove them to at least paint your walls with a fresh coat. Removing cabinets–especially if you plan to keep them–can be daunting because you don’t want to ruin them. Then, it defeats the purpose of keeping your cabinets. If you’re removing them because you intend to replace your kitchen cabinets, you might want to hold off on the sledgehammer. Some local warehouses might refurbish them or sell them as recycled wood. They’ll most likely pay you a small amount for your cabinets, which you can put towards your reno budget. You’ll want to take extra care in removing your cabinets.
Here are some basic steps and simple tricks to remove your kitchen cabinets.
1. Gather Your Tools: You’ll want to gather all your tools and materials first so that you have everything with you before you begin. Once you start placing cabinets all around your kitchen, it might be a little difficult to navigate through. Instead of trying to make your way around wayward cabinets, you can stay right in one spot and avoid accidentally tripping over a cabinet corner.
2. Remove the Contents: Take all the cabinet contents–including cabinet lighting–and place them in storage totes. This way, you can easily see what each container has in it, but they’re safely packed away instead of scattered around your home. Keep them in a room outside the kitchen but close enough that you can access them when you need to. When removing kitchen lighting, make sure to turn off the power that runs from your circuit breaker box to your kitchen cabinets. The last thing you want is to
3. Remove the Cabinet Doors (and Drawers on Base Cabinets): Once you have cleaned out the contents of each cabinet, you will want to remove the doors and drawers. This will give you full access to the cabinets, lighten the load of each cabinet as it is detached from the wall and allow you to clearly see any mounting screws that need to be removed. To remove the doors, open them on each cabinet and use your drill to unscrew the cabinet hinges from the cabinet frame. To remove the drawers, fully extend the drawer and lift it off of the drawer glides. Some newer drawer glides have a release latch on the underside of the drawer box that you will need to pull in order to lift them out.
4. Start with the Base Cabinets: Before we get to the actual process of removing each individual cabinet, it is important to point out that it is easiest if you start by removing the base cabinets first. Since they are the easiest to access, removing them first will open up the floor and make it easier for you to reach the wall cabinets without having to lean over the base cabinets. If you have any tall cabinets (pantries and oven cabinets), leave those for last.
5. Remove One Cabinet at a Time: We recommend removing the cabinets one at a time. So you will want to go through steps 6-8 for each cabinet before moving onto the next cabinet.
6. Detach Each Cabinet From the Adjacent Cabinets: You are now ready to start removing the cabinets themselves. When cabinets are installed, they are attached to each other and the wall using screws. So you will first want to detach the cabinet you are removing from the adjacent cabinet. Inspect the frame of the cabinet you are removing as well as the frame of the adjacent cabinet to locate any screws that are attaching them to each other. Now use your drill to unscrew them.

Source: Andrey_Popov/Shutterstock.com
7. Detach Each Cabinet from the Wall: Make sure you have an extra pair of hands available to help you with this! As with most home improvement projects, they’re best done with a buddy instead of alone. Remove the screws at the top of the cabinet first and then move on to the screws underneath. Always remove the ones on the sides before removing the ones in the middle.
8. Remove the Last Screw: When you remove the last screw from your cabinets, make sure you have your buddy holding the cabinets against the wall. If not, the cabinet will fall, potentially hurting you, the floor or your helper. Once you remove the screw, the cabinet should come off the wall easily. If not, then the cabinet is still attached to the wall somewhere. Locate the attachment and unscrew it.
If you’re removing your cabinets to add a fresh coat of paint, rewire the electric or adjust the kitchen layout, you should use post-its or some other removable tag and mark your cabinets. You can tape the screws and hinges for each cabinet onto the back, or place them in individually marked snack baggies to keep them from disappearing or ending up with the wrong cabinet. This will help to ensure that your cabinets end up right back where they’re supposed to be and don’t get out of order, causing confusion when reinstalling them.

Source: ungvar/Shutterstock.com
When removing your current kitchen cabinets to replace them with new ones, it’s important you take extra care to remove them properly. If you don’t, you can damage the wall, making it more difficult (and expensive!) for you to install your new ones. If you accidentally damage your wall while removing your kitchen cabinets, you can still have the kitchen of your dreams. Even with the cost to repair your wall, you can save money with our wholesale kitchen cabinets! We don’t sacrifice quality over price, and our Premier Series cabinets are perfect for renovators looking to install beautiful, quality cabinets on a budget.
As daunting as removing kitchen cabinets may seem, it’s really all about having an extra set of hands available and keeping track of which items go where. Once you get started, you’ll realize just how easy it is! You’ll be a pro at removing kitchen cabinets in no time.
Shop New Kitchen Cabinets